Windows 11 A Step-by-Step Guide to Installation and Activation

Hello dear users and visitors of Aqoela ❤‿❤
How to install and activate Windows 10 and 11
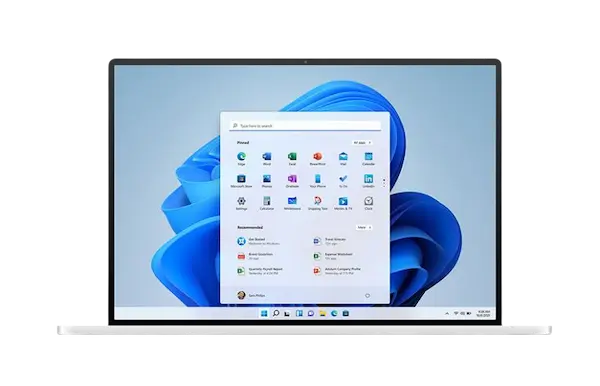
Hello there! Let's dive into Windows and explore why installing the original version is considered essential. Windows " Windows 11 " is a popular operating system developed by Microsoft. It serves as the foundation for countless computers and provides a user-friendly interface for users to interact with their devices. Whether you're using a desktop computer, laptop, or tablet, Windows offers a consistent and familiar experience across different hardware platforms.
Now, when it comes to installing the original version of Windows, there are several reasons why it's highly recommended:
Note: How to install Windows 10 is the same.
1️⃣ Security: The original version of Windows usually includes the latest security updates and patches, keeping your system better protected against potential vulnerabilities and cyber threats. Regular updates address known security issues, helping to ensure a safer computing environment.
2️⃣ Stability and Performance: Original versions undergo rigorous testing and optimization to provide a stable and efficient operating system. By installing the official release, you're more likely to experience smoother performance, improved reliability, and fewer compatibility issues with software and hardware.
3️⃣ Genuine License: Installing the original version ensures that you have a legitimate and properly licensed copy of Windows. This helps you avoid legal complications and potential limitations imposed on pirated or unauthorized copies.
4️⃣ Support and Updates: Microsoft provides support and continuous updates to the original version of Windows, granting you access to new features, bug fixes, and compatibility enhancements. This ongoing support ensures that you have an up-to-date and well-maintained operating system.
5️⃣ Software Compatibility: By using the official version, you can expect better compatibility with a wide range of applications and software. This reduces the likelihood of encountering compatibility issues and allows you to enjoy a seamless computing experience.
First part: How to install and activate Windows 11
First, to install Windows 11, "Windows 11 Pro" we check whether your system has the ability to install Windows 11 or not.
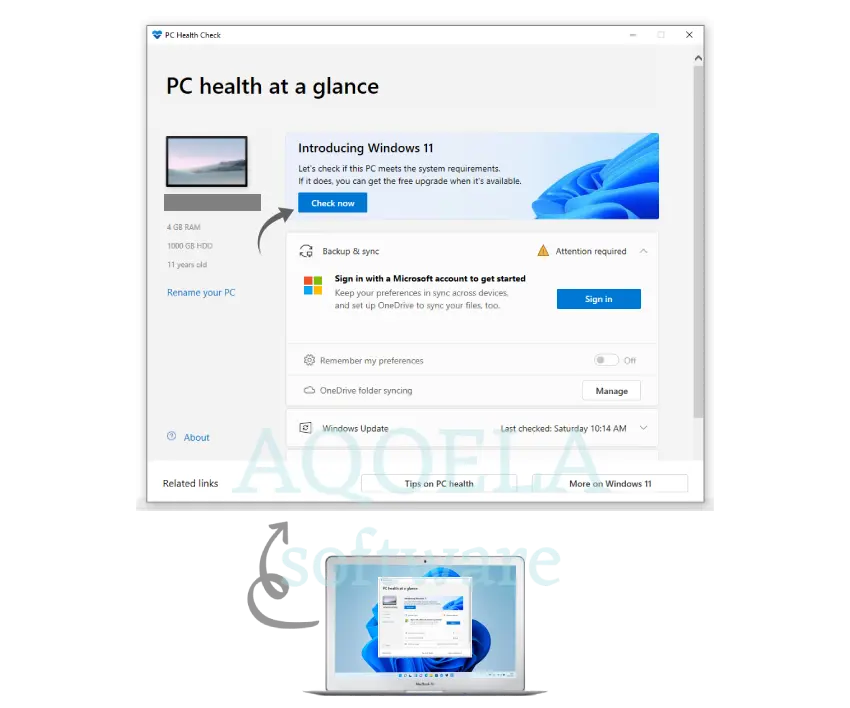
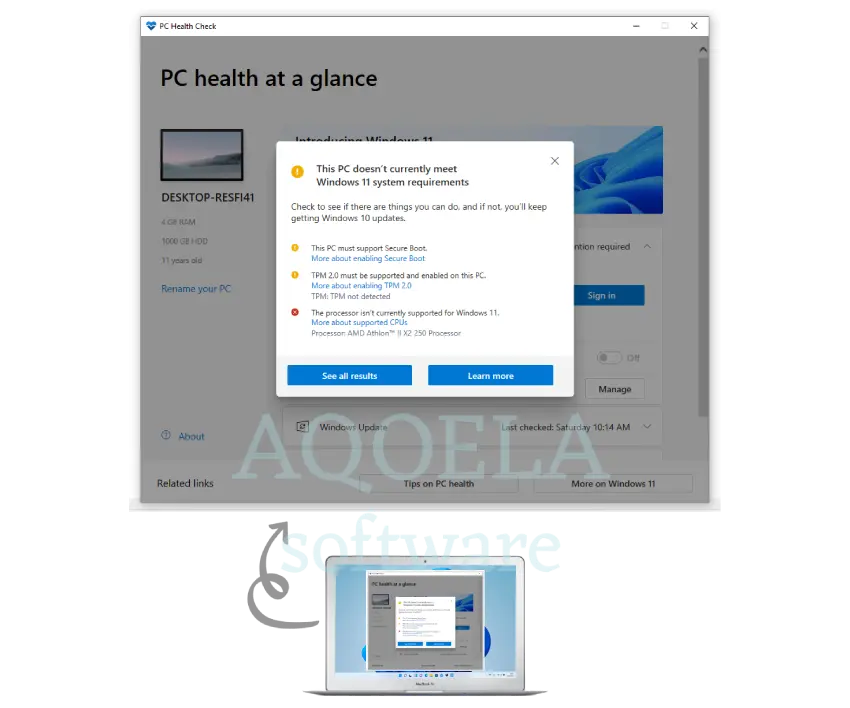
1. To do this, download and install the pc health check program from the Microsoft site, after doing this, click on the check now button, and then a notification will appear that informs you whether your system is compatible with Windows 11 or not.
The following message indicates that this computer does not currently meet the Windows 11 system requirements, otherwise a message will appear that says that your system does not have a problem with Windows 11 installation. The instructions below will walk you through everything you want to know about installing Windows 11.
How to create a Windows 11 bootable USB drive
Creating a bootable USB drive for Windows 11 is possible using Microsoft's Media Creation Tool. It does everything from formatting the USB drive to the correct format to downloading and setting up the files needed to boot into Windows 11 Setup. But before you start, here's what you need:
▪ A USB with at least 8 GB of storage space.
▪ Ability to connect to the Internet
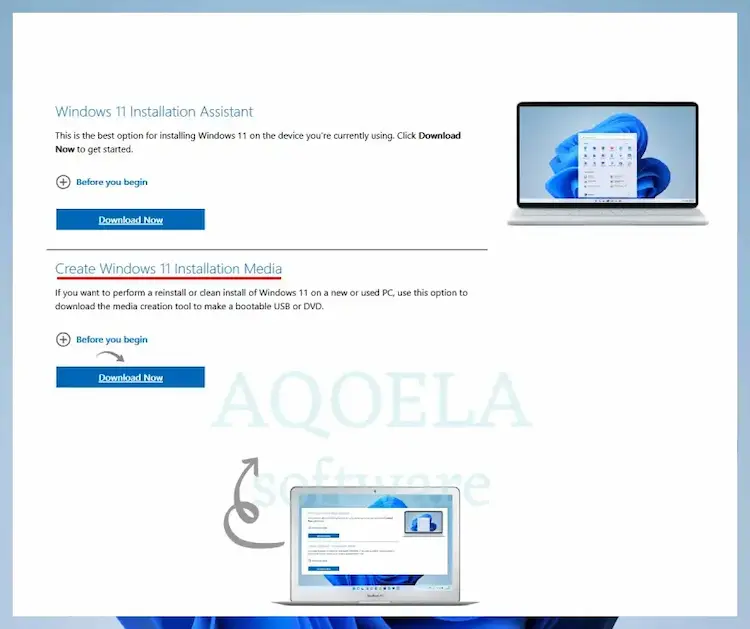
1. First, go to the Windows 11 download page on Microsoft. Then go to the Create Windows 11 Installation Media section and select the Download Now option to get the Media Creation Tool.
2. Run the downloaded file to launch the Media Creation Tool.
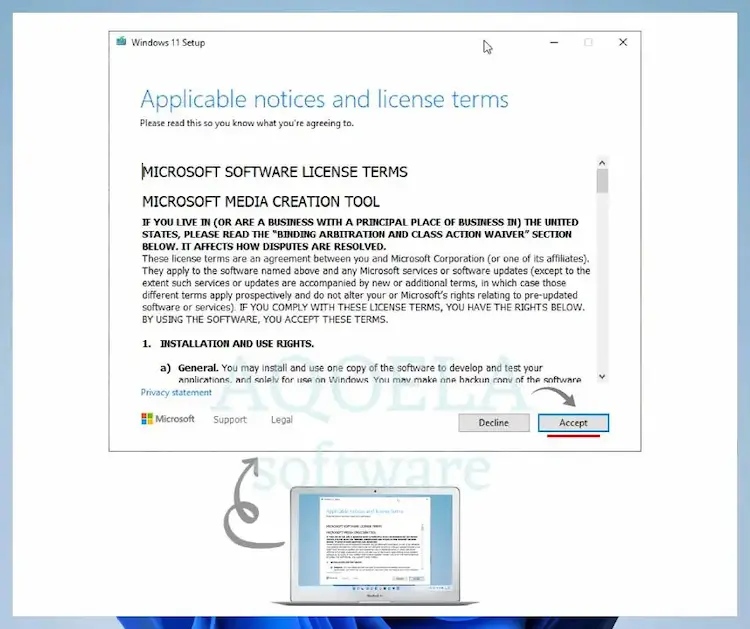
3. Select Accept to agree to the Microsoft Software License Terms.
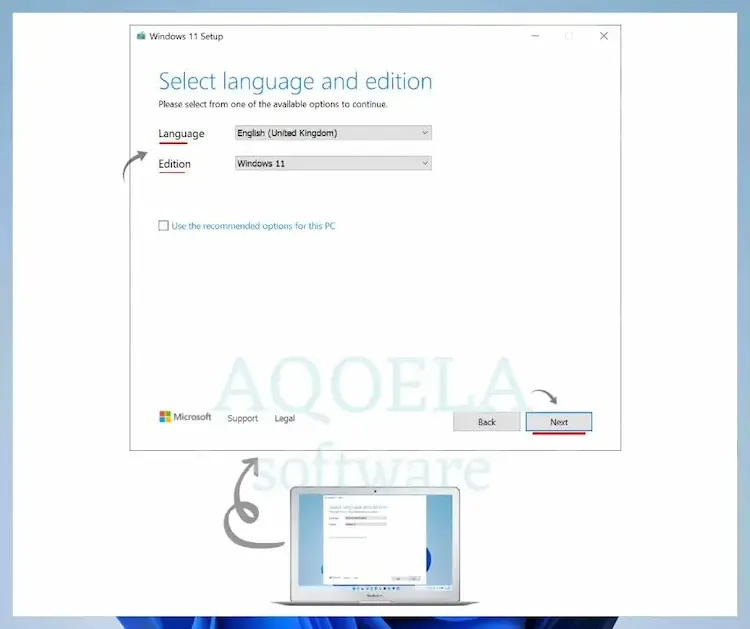
4. Now, select the language (for example, English) and version (Windows 11), and click Next.
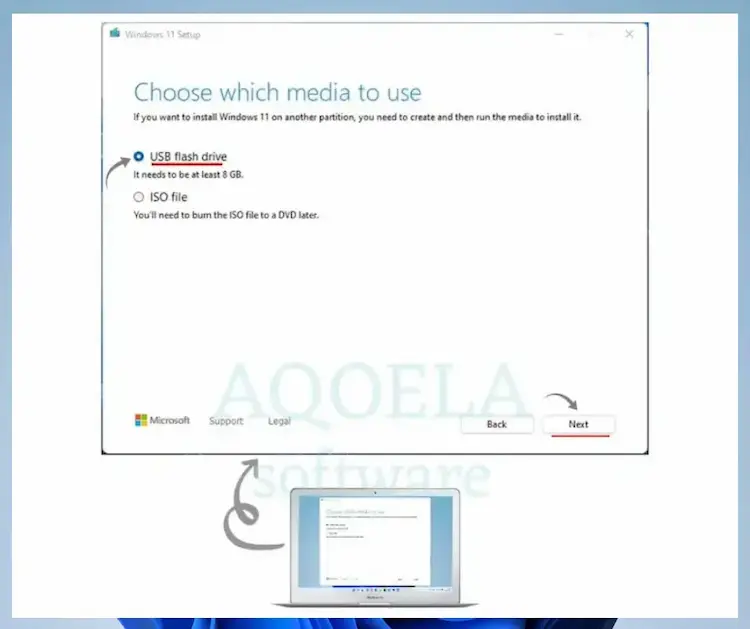
5. Connect the USB drive and select the first option of the radio button next to the USB flash drive to start downloading and loading the ISO file on the desired flash drive.
6. Select your correct USB flash drive from the list of drives and click Next.
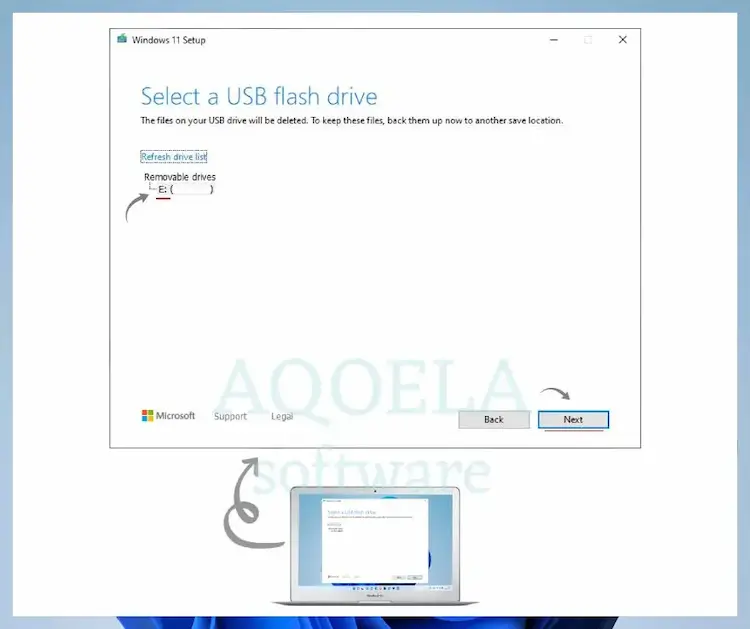
Warning: All data on the USB drive will be erased. If you have important data on it, back it up before selecting Next.
7. Wait for the software to download and boot the USB drive. Depending on the speed of your internet connection, it may take up to an hour (or even longer).
8. Select Finish. The USB drive is ready to install Windows 11. If you plan to install Windows 11 on another PC, disconnect it.
How to install Windows 11 using a USB drive
Now that you're sure your computer meets the Windows 11 system requirements, the next step is to access your computer's boot manager. To do this, first restart your computer, then press buttons such as F2, F8, F9, F12 or Delete until the Boot Manager appears. "Be careful that entering the BIOS is different in every system; if you fail to use the methods recommended in the article, you can search the internet for how to enter your laptop type." After entering the BIOS settings section, you will enter the Setup section. On the Setup page, enter the Boot section. In most motherboards, this page has the same name, but its appearance is slightly different.
Notice: In old systems, after going to the boot screen, select the ADVANCED BIOS FEATURE option and then press the Enter button on the Boot Sequence option and select the USB option, and it is usually saved and restarted by pressing the F10 button.
Notice: In new systems, go to the boot section and select the USB Flash option, and it is usually saved and restarted by pressing the F10 button. Note that you must connect the USB in which you downloaded the software to the device beforehand.
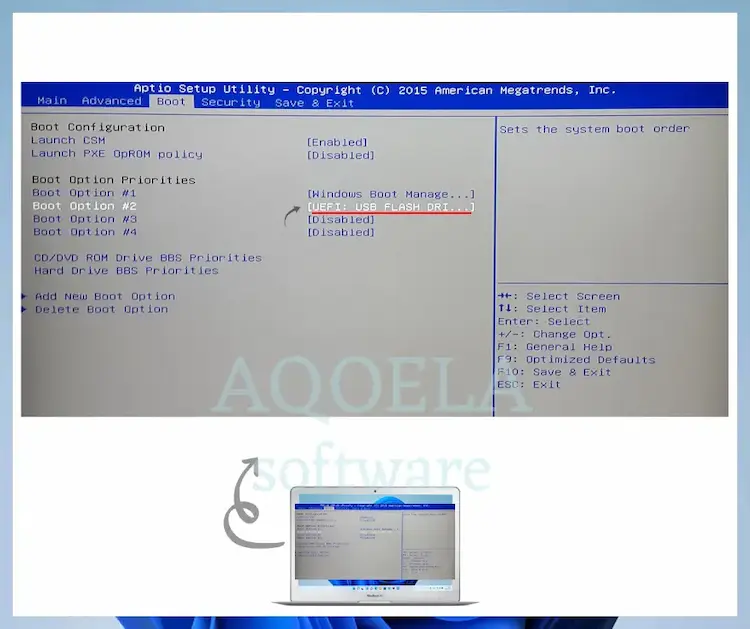
⚠️ Always remember that after finishing the installation and activation of Windows, restart your device and go to the boot section and instead of booting with flash, select the option of booting with the hard drive of the device and press F10 again and save.
After booting from the USB drive, you should see the Windows 11 settings screen. Follow the steps below to install Windows 11.
1. Specify your language, time and keyboard format and select Next.
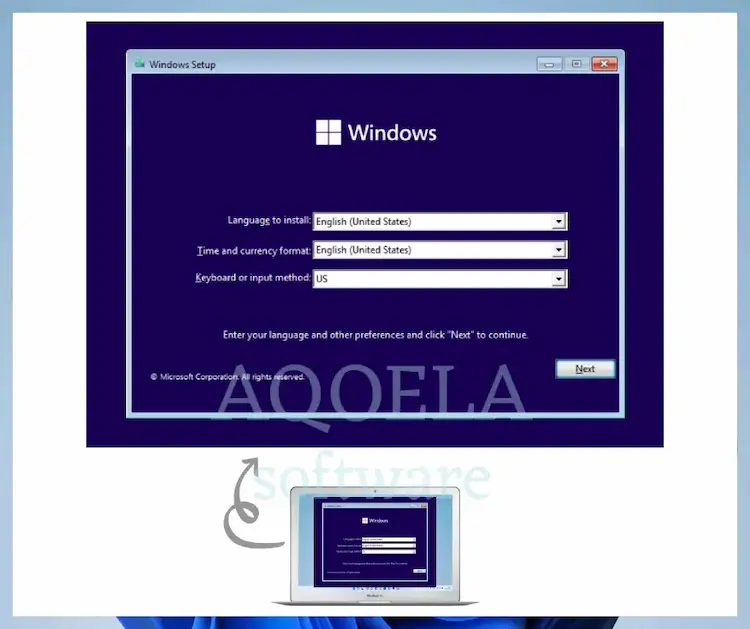
2. In the next step, select Install now.
3. Enter your Windows product key and select Next. If you don't have or want to activate Windows 11 later, select I don't have a product key.
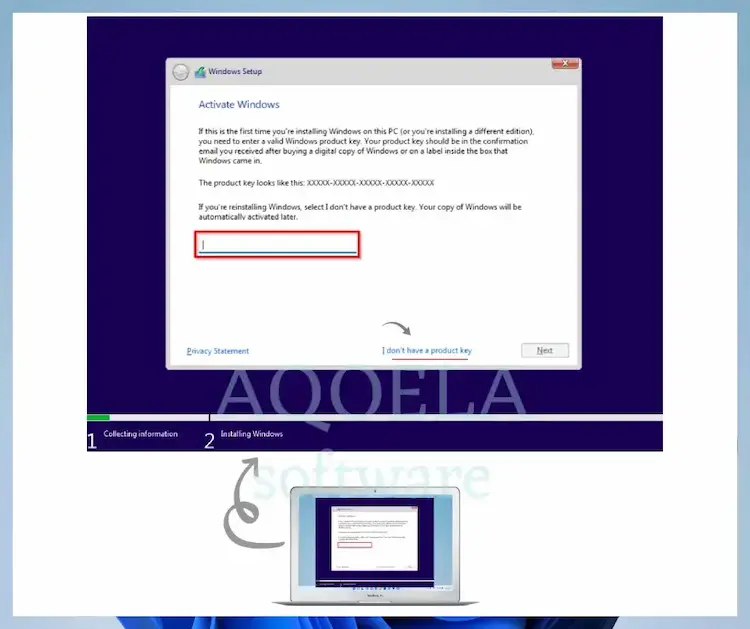
4. Select the version of the operating system you want to install - for example Windows 11 Home or Windows 11 Pro. Make sure it matches your Windows 11 license. Then click Next.
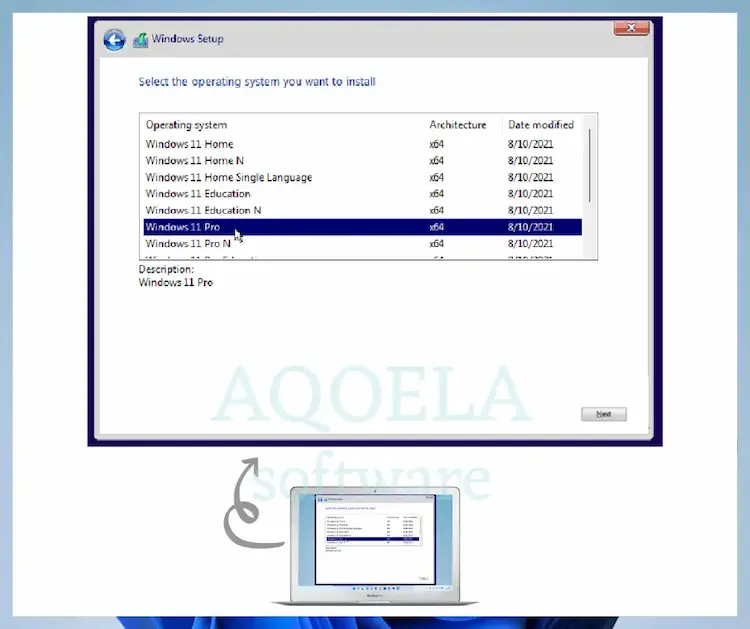
5. Accept the Microsoft software license terms and select Next.
6. Select an option called Custom: install Windows only. If you want to upgrade from a previous version of your operating system while keeping your data intact, choose Upgrade instead.
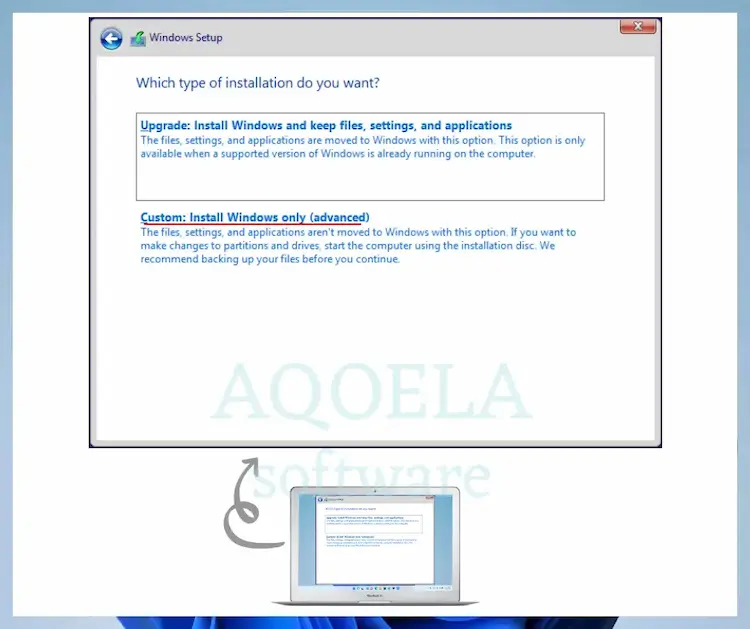
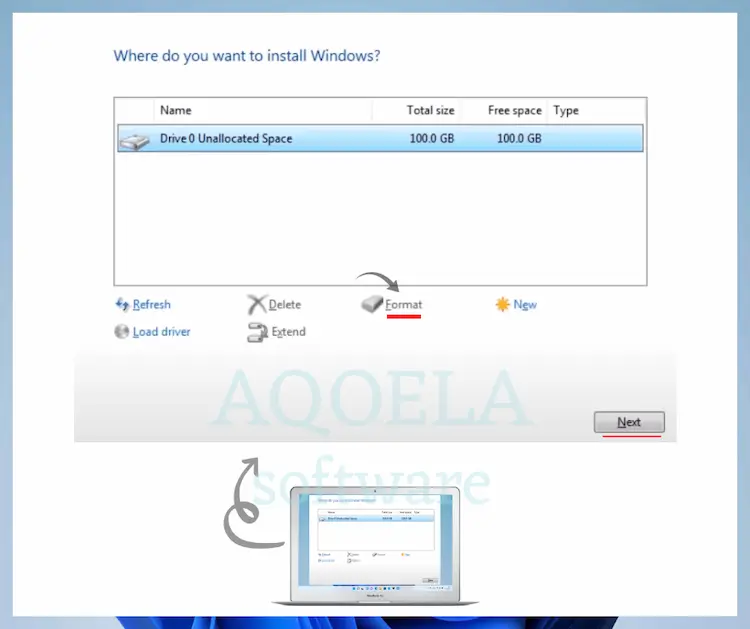
7. Select the drive or partition where you want to install Windows 11 and click Next.
Tip: If your previous Windows is in the driver you want, format it first.
8. Wait for Windows Setup to copy and install Windows 11 from the USB drive.
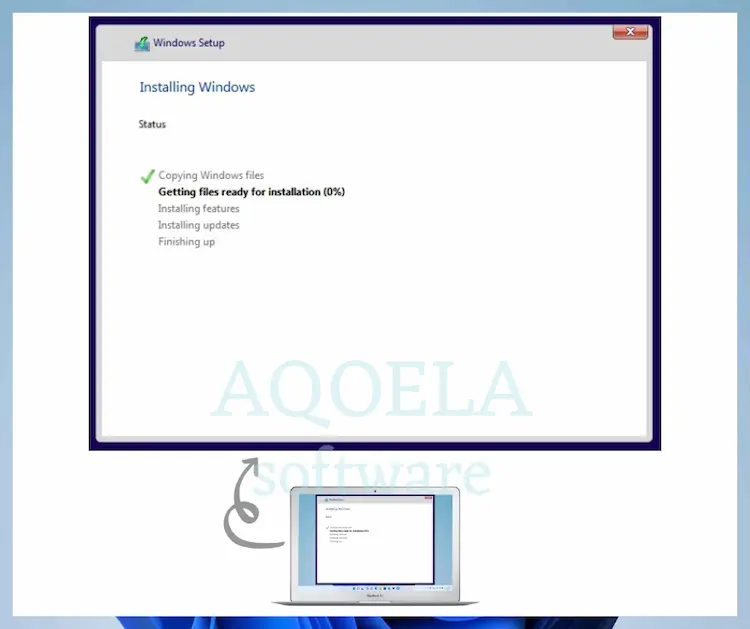
After Windows 11 installation is complete, your computer will restart automatically. Then you need to configure the operating system. After installing Windows 11, you will need to complete several screens to complete the operating system settings. This includes specifying the country or region, setting privacy settings, configuration, etc.
9. Choose a unique name and click next.
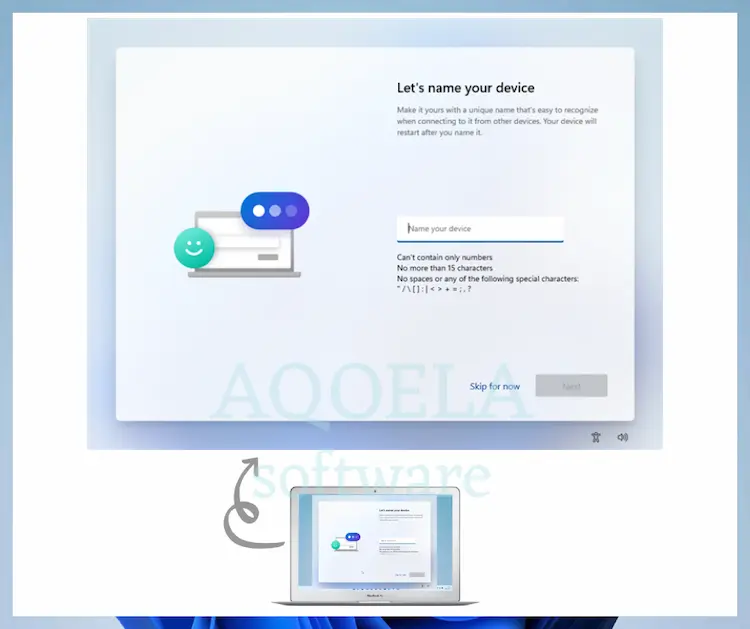
10. If you're signed in with a Microsoft account, you can decide whether you want to restore your settings, preferences, and programs from your previous Windows installation. If not, make sure to select the Set up as new device option to set up your computer from scratch.
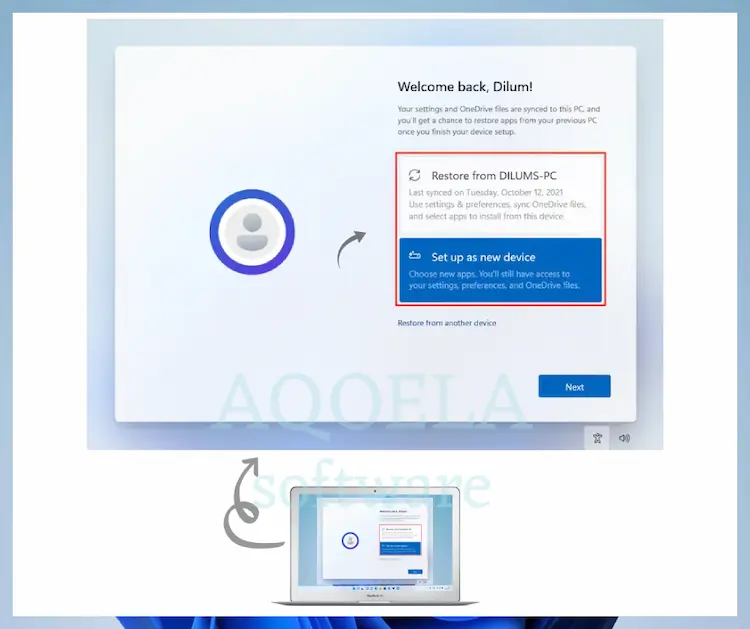
11. After the installation of Windows 11 is finished, you can start using Windows 11 immediately.
If you have not yet activated Windows 11 with an original Windows license, do not forget to activate it by going to Start > Settings > System > Activation.
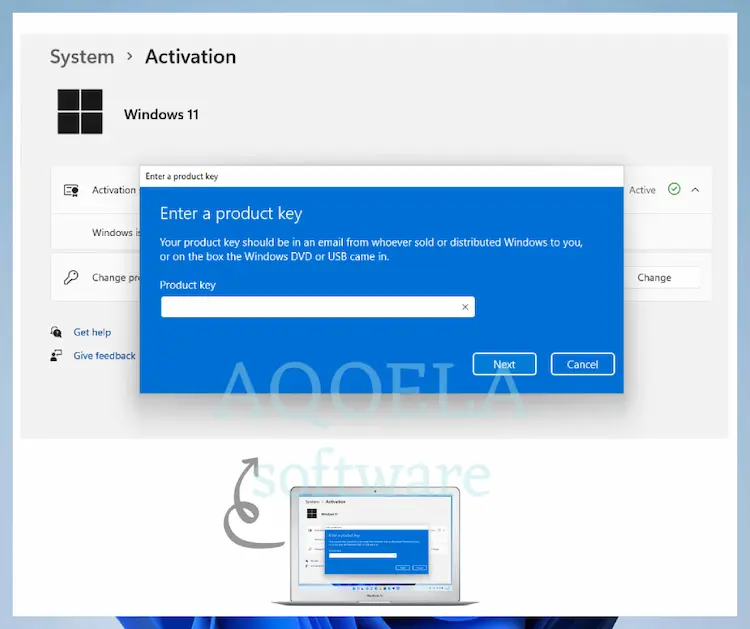
13. Finally, go to Windows Update and let Windows finish the update.
We hope you have experienced a clean and complete installation using this tutorial, if you are satisfied with this tutorial, share it with your friends.
